
Valentine’s Day – the day of love and affection, a time when we express our deepest emotions to those who hold a special place in our hearts. It’s that magical occasion when love is in the air, and romance fills every corner. While store-bought cards are readily available, there’s something extra special about crafting DIY Valentine’s Day cards for your loved ones.
These personalized creations not only showcase your creativity but also convey a heartfelt message that no mass-produced card can replicate. So, let’s dive into the world of handmade cards and discover how you can make your loved ones feel truly cherished this Valentine’s Day!
The personal touch of DIY Valentine’s Day cards
When it comes to expressing love and affection, there’s nothing quite like a DIY Valentine’s Day card. These handmade creations have a special personal touch that store-bought cards simply can’t replicate. By putting in the time and effort to create a unique card, you are showing your loved ones just how much they mean to you.
The beauty of DIY cards lies in their ability to be completely customized. You can choose the colors, patterns, and materials that best represent your relationship or reflect the recipient’s personality. Whether you opt for traditional reds and pinks or go for something more unconventional, the possibilities are endless.
To make your DIY Valentine’s Day card, you’ll need some basic materials such as cardstock paper, scissors, glue or tape, markers or pens for writing messages, and any additional decorations like stickers or ribbons. You can also get creative by incorporating photographs or small keepsakes into your design.
Start by folding the cardstock paper in half to create the base of your card. From there, let your creativity take over! Experiment with different designs such as heart cutouts or layered elements. If you’re feeling adventurous, try adding texture using embossing techniques or incorporating mixed media elements like watercolor paints.
When it comes to adding meaningful messages and sentiments to your DIY cards, think about what will resonate most with the recipient. Write from the heart – whether it’s sharing inside jokes or reminding them of cherished moments shared. Remember that words have power; even a simple heartfelt message can make someone feel incredibly loved and appreciated.
To add extra flair to your homemade creation consider incorporating additional creative touches and embellishments such as sparkles glitter confetti pressed flowers stamps washi tape 3D pop-ups pockets envelopes die cuts calligraphy hand-drawn illustrations The possibilities truly are limitless!
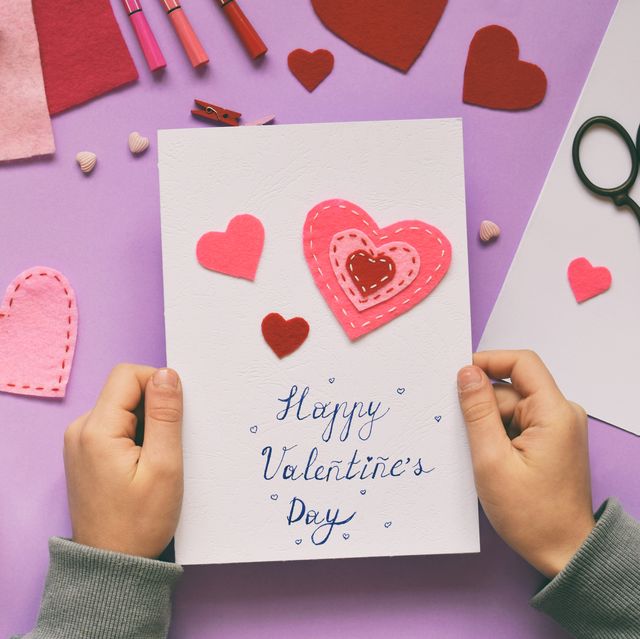
Involving children in making Valentine’s Day cards is not only a fun activity but also an opportunity for them to express their creativity and show love for family and friends. Encourage them to
Materials needed for making DIY cards
When it comes to crafting DIY Valentine’s Day cards, having the right materials is essential. Here are a few items you’ll need to get started:
1. Cardstock or construction paper: These sturdy papers will serve as the base for your cards. Choose colors that reflect the mood and theme of Valentine’s Day.
2. Scissors: A good pair of scissors is crucial for cutting out shapes, patterns, and designs for your cards. Make sure they are sharp and easy to handle.
3. Glue or adhesive tape: To secure all your elements in place, you’ll need some glue or adhesive tape. Opt for a strong adhesive that dries clear so that it doesn’t distract from your card’s design.
4. Markers or pens: Personalize your DIY cards with heartfelt messages using colorful markers or pens. Select shades that complement the overall color scheme of your card.
5. Decorative embellishments: Add extra flair to your creations with various decorative elements such as ribbons, buttons, stickers, sequins, or even dried flowers.
Remember that these are just basic materials; feel free to experiment with different supplies and techniques based on your creativity!
A step-by-step guide to creating your unique card
A step-by-step guide to creating your unique card:
1. Gather your materials: To get started, you’ll need some basic supplies such as colored paper or cardstock, scissors, glue or tape, markers or pens for decorating, and any additional embellishments you’d like to add.
2. Choose a design: Think about the recipient’s preferences and interests when selecting a design for your card. You can opt for traditional hearts and flowers or get creative with themes like nature, animals, or even favorite hobbies.
3. Plan your layout: Before cutting into the paper, sketch out a rough draft of how you want your card to look. Consider where you’ll place the message and any decorative elements.
4. Cut and fold: Once you have a plan in mind, carefully cut out shapes from the colored paper according to your design. Fold the base piece of paper in half to create a standard card shape.
5. Decorate with love: Use markers or pens to add personal touches to your card. Write heartfelt messages inside using beautiful calligraphy if possible.
6. Add special details: Take it up a notch by incorporating extra elements like ribbons, stickers, glitter accents, or even small photographs that hold significance for both of you.
7. Tidy up any loose ends: Make sure all edges are neat and trim off any excess paper so that everything looks polished before presenting it to your loved one on Valentine’s Day.
Ideas for different styles and designs
When it comes to DIY Valentine’s Day cards, the possibilities are endless. You can let your creativity run wild and come up with unique styles and designs that truly reflect your personal touch. Here are some ideas to get you started.
1. Classic Romance: Opt for a traditional red and white color scheme, using hearts, roses, and Cupid as your main design elements. Add a touch of elegance with lace or ribbon accents.
2. Minimalist Chic: Embrace simplicity by using clean lines and neutral colors like black, white, or pastels. Stick to geometric shapes or use minimalistic illustrations for a modern look.
3. Whimsical Wonderland: Let your imagination soar with whimsical designs inspired by fairy tales or fantasy themes. Incorporate magical creatures like unicorns or create dreamy landscapes filled with stars and clouds.
4. Vintage Vibes: Give your card a nostalgic feel by using vintage-inspired patterns like polka dots or damask prints. Use sepia-toned photos or distressed paper for an antique look.
5. Hand-lettered Love: Showcase your calligraphy skills by hand-lettering heartfelt messages on the front of the card. Experiment with different fonts and styles to add visual interest.
Remember, these are just starting points! Feel free to mix and match different ideas to create something uniquely yours.
Tips for adding meaningful messages and sentiments
Crafting DIY Valentine’s Day cards allows you to infuse them with heartfelt messages and sentiments, making them even more special for your loved ones. Here are some tips to help you add meaningful words and emotions to your handmade cards.
1. Reflect on the relationship: Before writing your message, take a moment to think about your relationship with the recipient. Consider their personality, shared memories, and inside jokes that can be incorporated into your card.
2. Be genuine: Express your feelings sincerely and authentically. Use your voice and write from the heart. Avoid clichés or generic phrases; instead, focus on personal thoughts that will touch the recipient’s heart.
3. Keep it simple: You don’t need to write an essay or use complicated language to convey your love and appreciation. Choose simple yet powerful words that capture the essence of what you want to say.
4. Use metaphorical language: Metaphors can add depth and creativity to your message by comparing something abstract or symbolic with the recipient or their qualities. For example, “You’re my shining star in a dark sky.”
5. Share specific memories: Recall happy moments you’ve shared as a couple or as friends/family members, highlighting how those experiences have enriched your life.
6. Include future aspirations: Show optimism for the future by expressing excitement about creating new memories together or setting goals as a couple/family unit.
7. Personalize it further: Add small touches like using nicknames or referencing favorite activities/hobbies that are unique to the person receiving the card.
Remember, these tips serve as guidelines but feel free to let inspiration guide you while crafting heartfelt messages for those dear to you this Valentine’s Day!
Additional creative touches and embellishments
Additional Creative Touches and Embellishments
When it comes to making DIY Valentine’s Day cards, the sky is the limit in terms of creativity. Adding special touches and embellishments can take your handmade card from ordinary to extraordinary. Here are some ideas to inspire you.
1. Get crafty with paper: Experiment with different types of paper like textured or patterned cardstock, vellum, or even recycled materials like newspapers or old magazines. Cut out shapes, use punches for intricate designs, or create a pop-up element for added wow factor.
2. Play with colors: Use vibrant hues that reflect the recipient’s personality or choose a monochromatic palette for an elegant touch. You can also try ombré effects by blending shades using watercolors or ink blending techniques.
3. Incorporate mixed media: Add visual interest by incorporating other materials such as fabric scraps, ribbons, buttons, beads, sequins, washi tape, or even dried flowers and leaves. These elements can be used as borders, accents on illustrations/lettering/doodles,
4. Try hand lettering: Personalize your card by hand lettering meaningful quotes or messages instead of relying on store-bought stickers or printed sentiments. Practice different calligraphy styles such as brush lettering or modern fonts to add a unique touch.
5. Include interactive elements: Make your card interactive by adding hidden pockets where small notes can be tucked in for an extra surprise when opened.
Or consider attaching a mini photo album inside the card containing memorable moments shared with your loved one.
Remember that these are just starting points – let your imagination run wild! The more personal and tailored each detail is to the recipient’s preferences and interests, the more meaningful your DIY Valentine’s Day card will become.
How to involve children in card-making activities
Valentine’s Day is the perfect time to involve children in fun and creative activities that help them express their love for family and friends. Card-making is a great way to engage their imagination and teach them about the meaning of this special day. Plus, it allows them to make personalized gifts that will surely warm the hearts of their loved ones.
To get started, gather some basic materials like colored paper, glue sticks, markers, and scissors. Sit down with your child and ask them who they would like to make cards for. Encourage them to think about what each person means to them – this will inspire thoughtful designs!
Guide your little one through each step of creating a card: folding the paper in half or cutting out heart shapes, decorating with drawings or stickers, and writing sweet messages inside. Remember, perfection isn’t important here; it’s all about embracing their creativity.
For younger kids who may struggle with cutting or writing, you can assist by pre-cutting shapes or writing out messages for them to trace over. This allows children of all ages to participate in making heartfelt cards.
It’s also a great opportunity for siblings or friends to work together on joint projects. They can collaborate on designs or divide tasks such as coloring or writing different parts of the card.
By involving children in card-making activities for Valentine’s Day, you’re not only fostering their creativity but also teaching important values like gratitude and kindness towards others. It offers an opportunity for meaningful conversations about love and appreciation while spending quality time together.
So gather your art supplies, invite your little ones into the craft corner, and watch as they delight in creating unique cards filled with love!
Benefits of giving handmade cards over store-bought ones
When it comes to expressing your love and appreciation on Valentine’s Day, there is no better way than with a handmade card. These personalized creations offer a unique touch that store-bought cards simply can’t replicate. Here are some benefits of giving handmade cards over those generic mass-produced options.
Handmade cards show the recipient just how much thought and effort you put into their gift. The time spent crafting each element of the card demonstrates your dedication and love for them. It’s a tangible representation of your feelings that they can cherish forever.
Homemade cards allow for complete customization. You have the freedom to choose every aspect, from the design to the message inside. This allows you to tailor the card specifically to suit your loved one’s personality and preferences. Whether it’s incorporating their favorite colors or including an inside joke, these personal touches make all the difference.
Additionally, creating handmade cards provides an opportunity for self-expression and creativity. You can experiment with various artistic techniques such as painting, drawing, or even collage-making. The process itself becomes enjoyable and therapeutic while allowing you to unleash your imagination.
Furthermore, giving someone a homemade card shows that you value their uniqueness and individuality. Store-bought cards often lack authenticity as they are designed with mass appeal in mind. In contrast, a handcrafted card reflects both the giver’s personality and celebrates what makes the recipient special.
Conclusion: Spread
Valentine’s Day is a special occasion to celebrate love and affection. While store-bought cards are readily available, there is something truly magical about receiving a homemade card filled with heartfelt sentiments. By crafting your own DIY Valentine’s Day cards, you can add a personal touch that will make your loved ones feel extra special.
To embark on this creative journey, gather the following materials: blank cards or cardstock, scissors, glue or double-sided tape, markers or colored pencils, decorative paper or stickers, and any other embellishments you desire.
Now let’s dive into the step-by-step guide for creating your unique card. Begin by folding the blank card in half to create the base of your design. Then unleash your creativity! Whether it be using watercolors for a dreamy effect or cutting out heart shapes from patterned paper – let your imagination run wild.
Ideas for different styles and designs are endless. You could opt for classic reds and pinks with hearts and roses illustrating romance. Or perhaps go for a more whimsical theme featuring cute animals declaring their love! The choice is yours; just remember to have fun while doing it.
When adding meaningful messages and sentiments inside the card, consider what would resonate most with the recipient. Think about shared memories, inside jokes, or even quotes that hold significance to both of you. A heartfelt message will surely bring warmth to their heart as they read it.
Don’t forget those additional creative touches! Adding ribbons or bows can elevate your creation further while giving it an elegant finish. Alternatively, try incorporating elements such as dried flowers or lace for an added tactile experience.